Get Started with WPimg
Follow these simple steps to optimize your WordPress images.
You're Almost There
Follow the steps below to install and activate your plugin.
Download the Plugin
Download the plugin ZIP file. The free tier includes 2,500 image optimizations — no payment required to get started.
Download PluginClick below to download the plugin ZIP file.
Download PluginInstall in WordPress
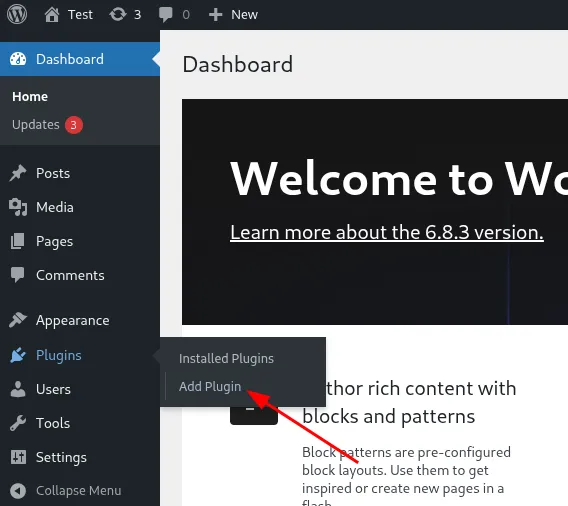
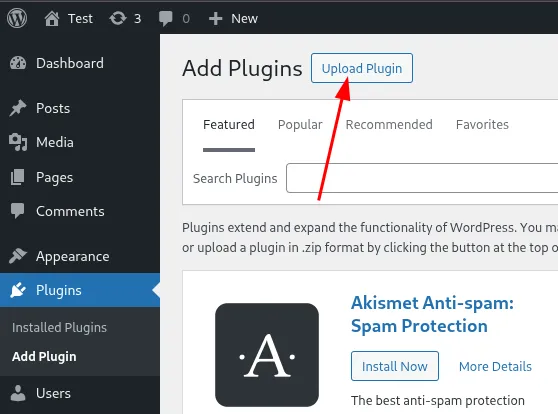
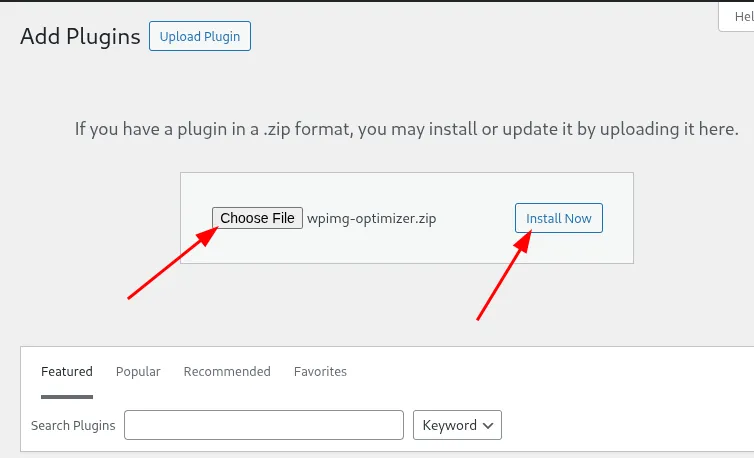
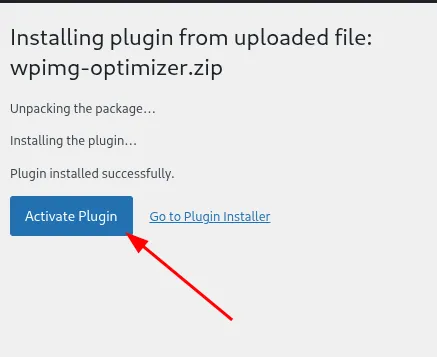
In your WordPress admin panel (yoursite.com/wp-admin), go to Plugins → Add Plugin → Upload Plugin, select the ZIP file, and click Install Now.
Enable Optimization
Go to Settings → Image Optimizer, accept the Terms of Service, and click Enable. The free tier starts working immediately — no license key required.
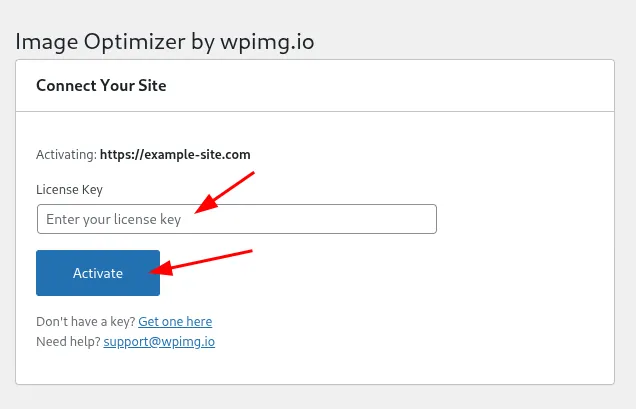
Go to Settings → Image Optimizer and enter your license key below to unlock Pro features.
Frequently Asked Questions
Do I need to re-upload my existing images?
No! The plugin works automatically with all your existing images. They're optimized on-the-fly when visitors request them.
Will this slow down my site during optimization?
Your server never does any optimization work—that happens on our infrastructure. The first request for an image may have a brief delay while it's optimized, but after that it's served instantly from our global CDN.
What happens if I deactivate the plugin?
Your original images are never modified. If you deactivate the plugin, your site will simply serve the original images again.
Does it work with page builders like Elementor?
Yes! The plugin works at the HTML output level, so it's compatible with almost all themes and page builders.
What image formats are supported?
The plugin handles JPEG, PNG, GIF, and WebP images. It automatically serves them in the most efficient format—WebP or AVIF—based on browser support.